SLA Monitoring for JIRA app gives you the possibility to add one or more actions to execute for each indicator
1. Click on the tab 'Actions', to access the screen of the creation of the actions, the following screen is displayed
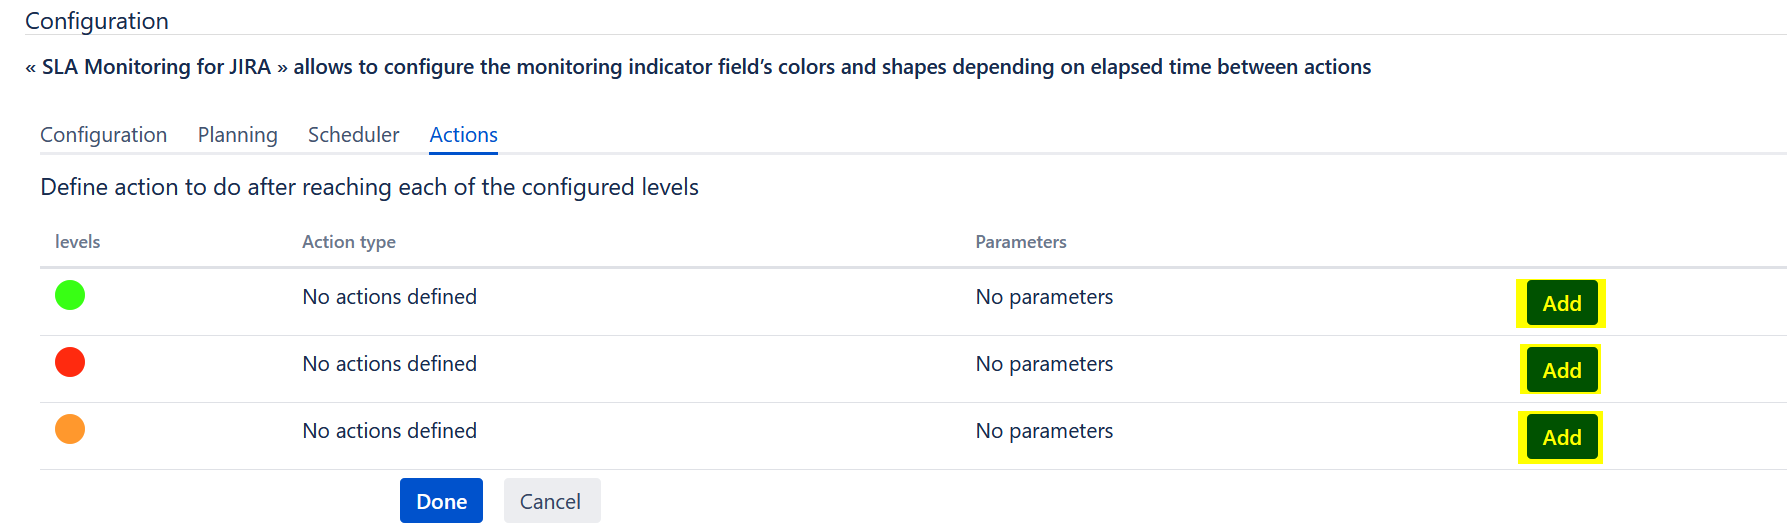
2. Click on the corresponding 'Add' button of the indicator whose you want to create the actions
The following popup is displayed:
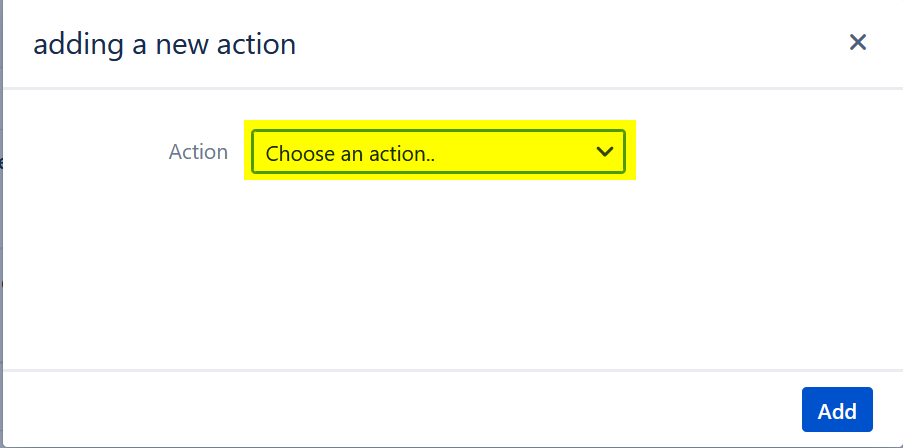
3. Choose the type of action that you want to add :
- Custom Action
- Email Notification
3.1.Custom Action
Fill the following fields to create a custom action
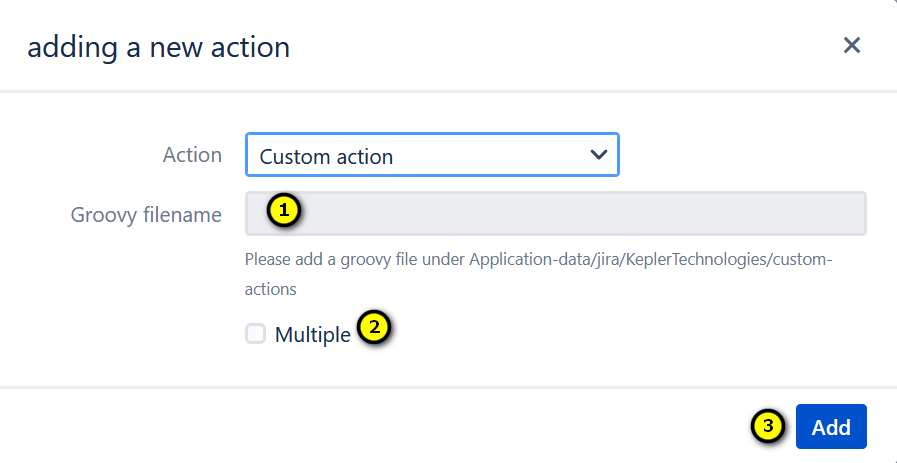
- Define the Groovy filename to execute (The path of the groovy filename: Application-data/jira/KeplerTechnologies/custom-actions
- The action is executed on each time that the scheduler is launched (if Yes, Click on the checkbox)
- Save the action by clicking on the button 'Add'
3.2.Email Notification
Fill the following fields to create an email notification action
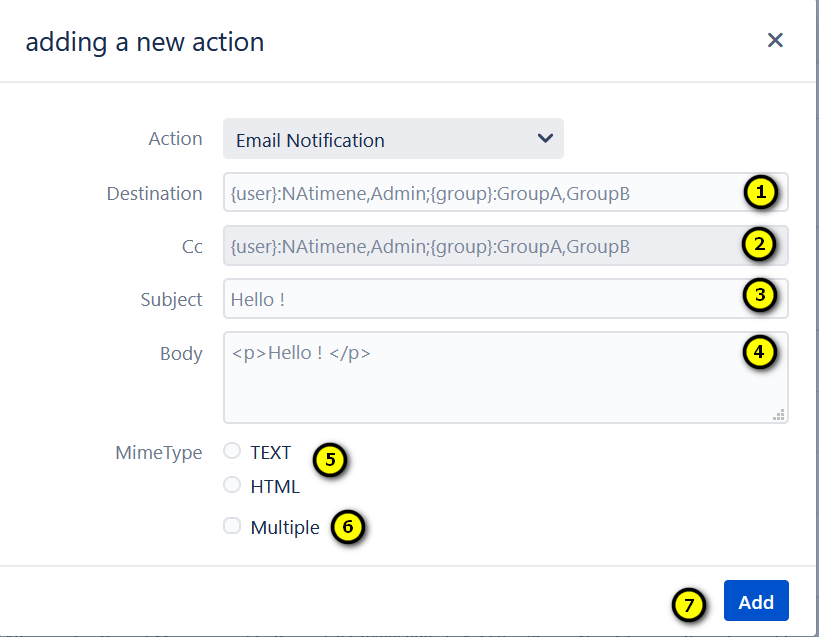
- Define the name of the users or groups that the notification will be sent
- Define the name of the users or groups who will be on cc of the email notification
- Define the subject of the email notification
- Enter the body of the email notification
- Choose the mimeType of the body (Text or HTML)
- The action is executed on each time that the scheduler is launched (if Yes, Click on the checkbox)
- Save the action by clicking on the button 'Add'
You can see the configuration of the action on the tab "Action"
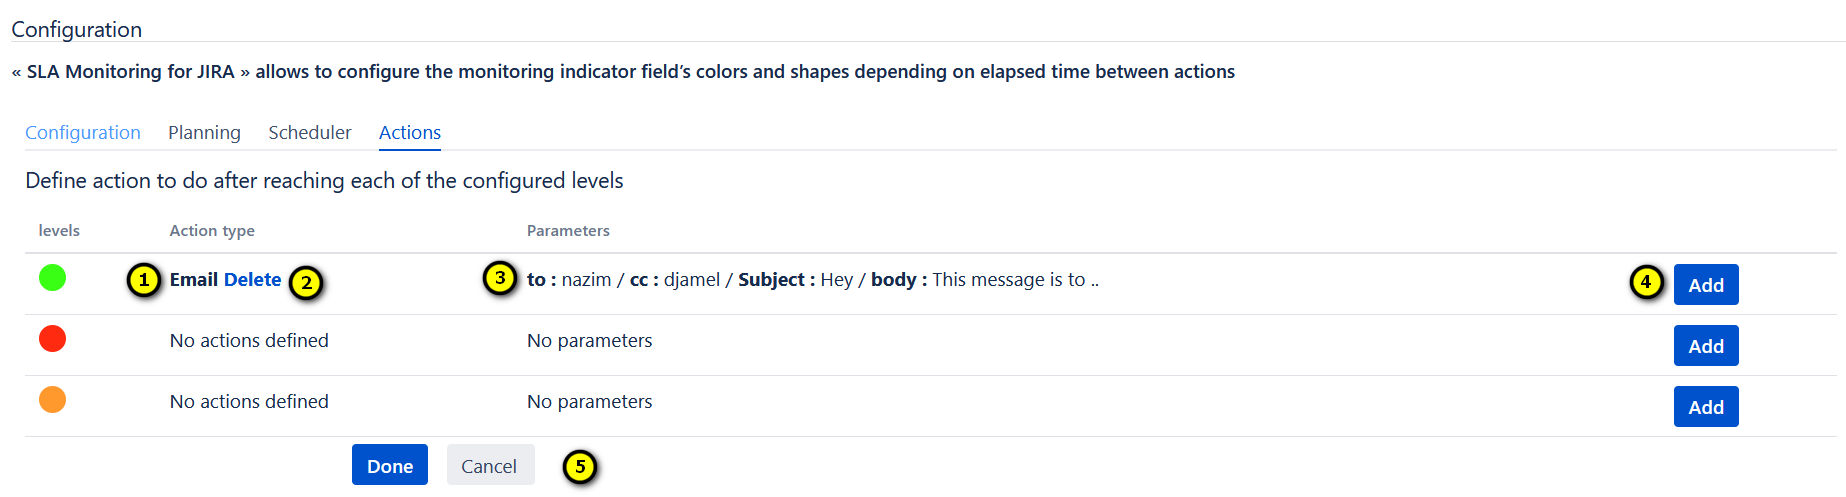
- Type of the action that you have added
- Click on the button 'Delete' to delete the action
- The parameters of the action
- Click on the button 'Add' to add another action
- At the end Save the configuration by clicking on the button 'Done', else click on the button 'Cancel', to cancel the configuration