In this section, we will configure a scheduler to calculate the processing time and set the value of the SLA Monitoring flag
Click on the tab 'Scheduler', to configure a schedular of the SLA
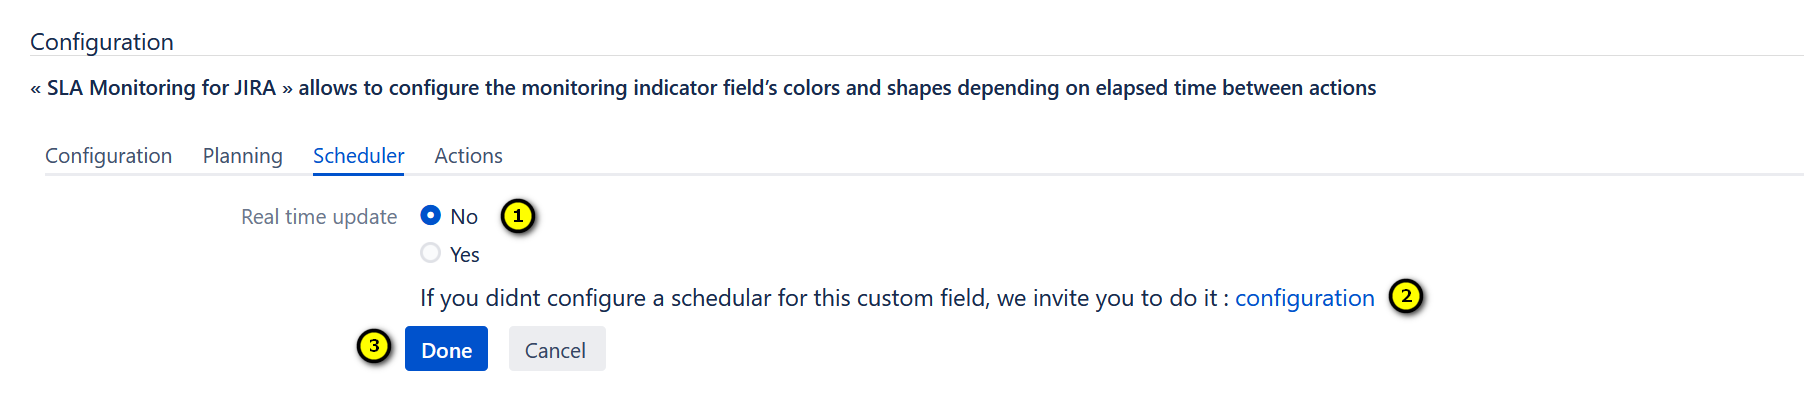
- Is it a real time update ? Click Yes or No
- Click on to access to the screen of the configuration of the scheduler
- Save the configuration by clicking on the buton "Done" . Else, click on the buton 'Cancel' , to cancel the configuration of the scheduler
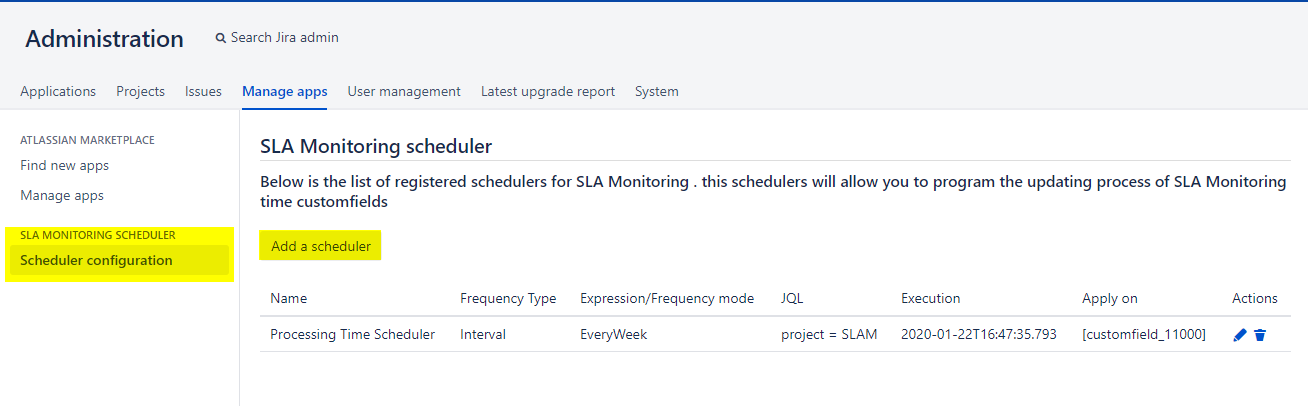
The configuration of the scheduler
There is two ways to access the screen of the configuration
- Following the path : Administration > Manage Apps > SLA Monitoring scheduler > Scheduler configuration >Click on "Add a scheduler".
- Click on the buton configuration on the tab 'Schedular' of the configuration of the SLA Monitoring
A new screen is displayed, we'll define the settings of the scheduler
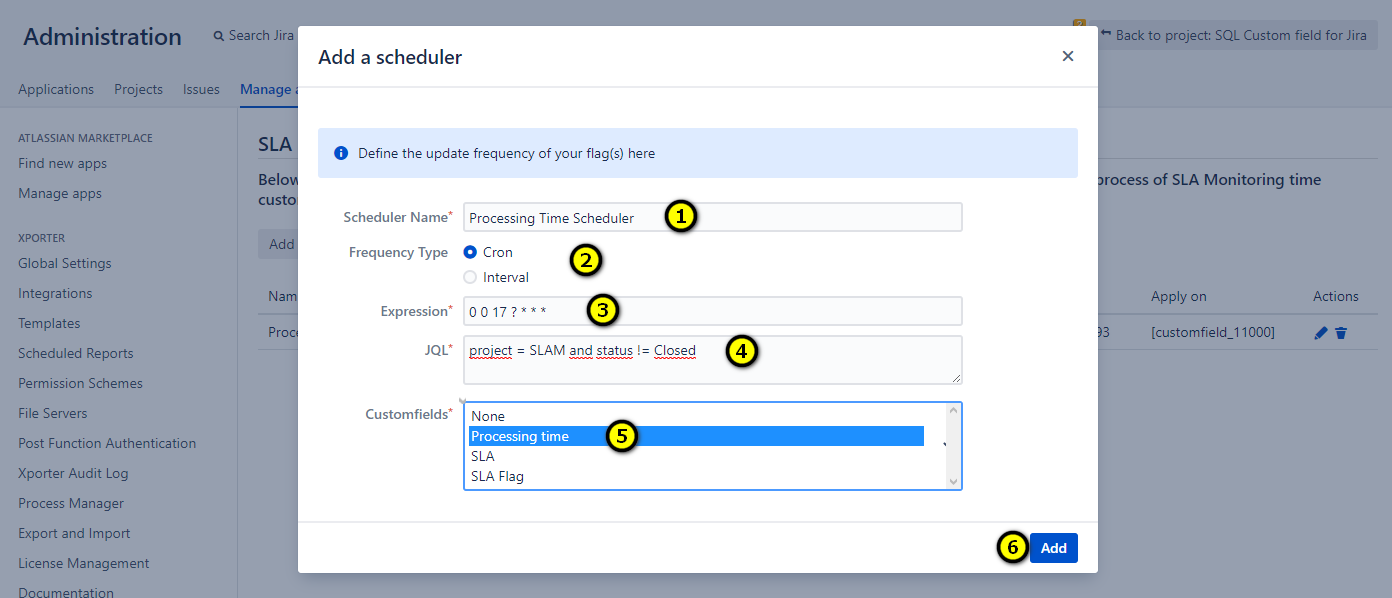
- Set the name of the scheduler;
- Set the frequency type;
- If frequency type is "Cron" we have to set the Cron expression Ex : 0 0 17 ? * * * which means that it will be executed every day at 7pm. For the frequency type "Interval", we have three choices:
- Set the JQL request that returns the list of issues to be processed;
- Select the customfield that we created previously;
- Click on "Add" button to save the configuration.
To create an action to do for each indicator, click on the tab "ACTIONS"